Learn how to easily make chicken or beef stock using a stock pot or electric roaster, and how to pressure can it to make it shelf stable.
Having good homemade stock on hand for soups, stews, sauces and casseroles is not only delicious, but it's also more nutritious. Not only does homemade stock taste better than pre-packaged store-bought versions, but it's also simple to prepare and preserve. Homemade stock is one of my favorite things to pressure can.
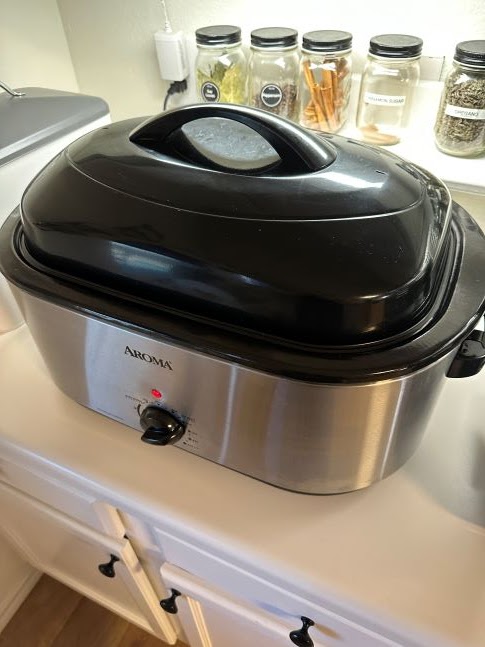
Anytime we have leftover chicken bones, a rotisserie carcass, turkey carcass or beef bones, you can bet they're going straight into the freezer to make stock at a later date. Typically, when I make chicken stock, I always make a large batch and slow cook it in my electric roaster, but stock can also be made using a stock pot, slow cooker or even in an instant pot.
I can't say enough about how much better your recipes will taste using homemade stock. Trust me, once you make your own, you will never buy store-bought again. Like I said before, making chicken stock is simple, so follow along, and you too will be well on your way to filling your pantry with jars of homemade goodness.
WHY I PREPARE & PRESERVE MY OWN STOCK:
There are so many reasons to make your own chicken stock - enhanced flavor, cost effective, packed with nutrients, improves digestion and more!
FLAVOR: You know the saying "everything taste better homemade" well the same holds true for homemade stock. Homemade stock has a richer, deeper flavor than what you get in store-bought broths.
NUTRIENTS: Homemade stock is packed with nutrients like calcium, magnesium, and collagen, all extracted from the long simmering of the bones.
ECONOMICAL & COST EFFECTIVE: Using chicken bones, beef bones and turkey bones + vegetable scraps that otherwise would be discarded makes this recipe very economical. Homemade broths and stocks are also cheaper than store-bought versions, and they are higher quality that what you get in a carton.
INGREDIENTS: I can control exactly what goes into my stock and customize the flavor to my own preference. Homemade stock also does not contain unwanted preservatives, sodium or artificial flavors that store-bought versions have.
SKILL LEVEL: Making homemade stock is super simple and you only need basic ingredients like chicken or beef bones, a leftover rotisserie, roasted chicken or turkey carcass, and vegetable scraps such as carrots, onions, celery and herbs. .
THE DIFFERENCE BETWEEN STOCK AND BROTH:
Stock and broth are often used interchangeably, but there are some differences.
STOCK: is made with bones and simmered for a long period of time to extract collagen and gelatin. The result is a richer stock, with a deep flavor and has a thicker, more gelatinous consistency when chilled.
BROTH: is made using meat, vegetables or both, and is typically simmered for a shorter period of time. Broth is generally thinner and less gelatinous, but can be more flavorful when seasonings or herbs are added.
🥘 EQUIPMENT NEEDED:
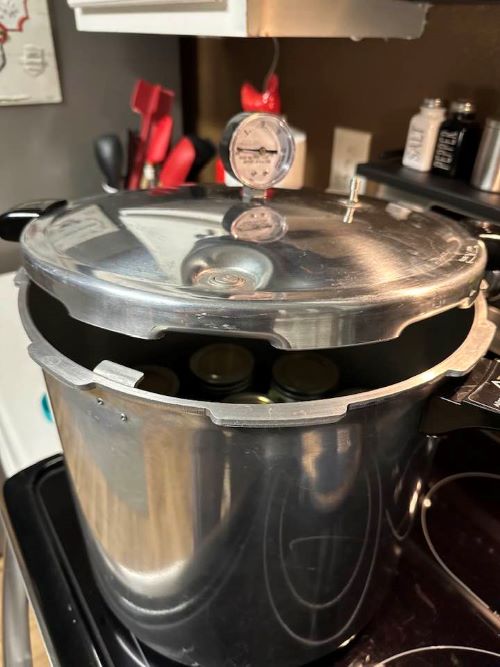
- Pressure Canner (I use the Presto 23 Quart Pressure Canner)
- Stock Pot or Electric Roaster
- Canning Jars (I use Quarts)
- Canning lids and rings
- Canning Funnel & Jar Lifter
- Ladle
- Fine Mesh Strainer or cheesecloth
- Bowl or pot to catch strained broth
- Dish Towel
- White Vinegar
🥣 INGREDIENTS:
- chicken bones, chicken carcass, skin + any chicken thighs, legs and wings or
- use Chicken Stock Freezer Packs (pictured above and info below)
- carrots (tops can be used as well)
- celery scraps and leaves
- onions roughly cut & Onion Skins
- garlic
- salt and pepper, to taste
- fresh herbs (parsley, thyme and bay leaf)
- peppercorns
- apple Cider Vinegar (this helps extract minerals from the bones, adding to the nutritional value of the broth).
WHAT ARE CHICKEN STOCK FREEZER PACKS? Chicken scrap or chicken stock freezer bags are gallon size freezer bags filled with chicken bones, skin, carcasses from a rotisserie or whole roasted chicken, vegetable scraps (such as carrots, celery, onions and onion skins) that would otherwise have been thrown out. All packed into a bag and placed in the freezer until ready to use.
HOW TO USE CHICKEN STOCK FREEZER PACKS: When it comes time to make your stock, just toss the whole freezer scrap/stock bag into a stock pot or electric roaster, add enough water to cover the ingredients. I had a package of wings in the freezer so I tossed those in as well. Add the apple cider vinegar and any spices and herbs of your choosing. Now you're well on your way of making homemade chicken stock. 👍
If you don't have freezer stock bags you can use any leftover chicken carcass from a whole roasted chicken or use a store-bought rotisserie chicken. Add the bones, carcass, and skin from rotisserie or whole chicken and add into a large stock pot or roaster. Add onions, carrots, celery, celery tops, onion skins, bay leaves and any seasonings or herbs (I use peppercorns, bay leaves, parsley and fresh thyme) and cover everything with water.
Simmer the chicken stock on low for 3-8 hours. If using an electric roaster keep the temperature between 200-250 which is the low setting.
Remove the lid, turn off the heat and let the stock cool for a bit. Strain the broth through a fine-mesh strainer (over a stock pot to catch the broth), discard the bones, vegetables and seasonings so you are just left with a clear smooth stock.
At this point, I place the entire stock pot in the refrigerator overnight so the grease releases from the stock and floats to the top. This process yields a clearer, less greasy and more flavorful stock. When I am ready to use the stock, remove the pot from the refrigerator and remove the solidified grease from the top of the stock and discard. Now it is time to reheat the stock and process it in the pressure canner.
WHY PRESERVE STOCK BY PRESSURE CANNING:
All low-acid foods MUST be pressure canned and NEVER water bath canned.
A pressure canner preserves low acid foods safely to make them shelf stable. It allows low acid foods to be processed at a higher temperature (240 F or higher). The high temperature effectively destroys harmful bacteria, including those that cause botulism, which is a concern when preserving low acid foods like, meat, poultry and most vegetables. Boiling water bath canning only reaches 212 F, which is not sufficient to destroy botulism spores.
A pressure canner preserves low acid foods safely to make them shelf stable. It allows low acid foods to be processed at a higher temperature (240 F or higher). The high temperature effectively destroys harmful bacteria, including those that cause botulism, which is a concern when preserving low acid foods like, meat, poultry and most vegetables. Boiling water bath canning only reaches 212 F, which is not sufficient to destroy botulism spores.
Place the stock pot on the stove top and slowly reheat the stock to boiling before canning. This step is essential to make sure the stock is hot enough to be safely filled into jars for canning. While the stock is reheating prepare and sterilize your canning jars and add them to a pot of hot water to keep them warm before filling.
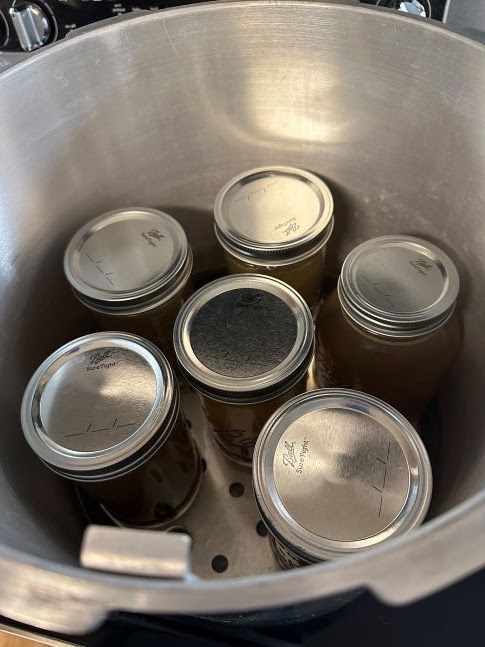
Carefully fill the jars with hot stock leaving a 1 inch headspace. Fill the canner with 3 quarts of water (or per your canners instructions) and add a splash of vinegar to the water to prevent the jars from getting cloudy.
Wipe the jar rims clean with white vinegar to ensure all of the grease is removed, add the lids and bands, and twist the bands to finger tip tight. Place the jars in the canner using a jar lifter. Place the lid on the pressure canner and lock the lid.
Bring the canner to a boil and vent the canner for 10 minutes or until steam is released through the vent howl. Add the weight over the vent hole, and process the jars at (10 pounds of pressure) for 20 minutes for pints and 25 minutes if using quart size jars.
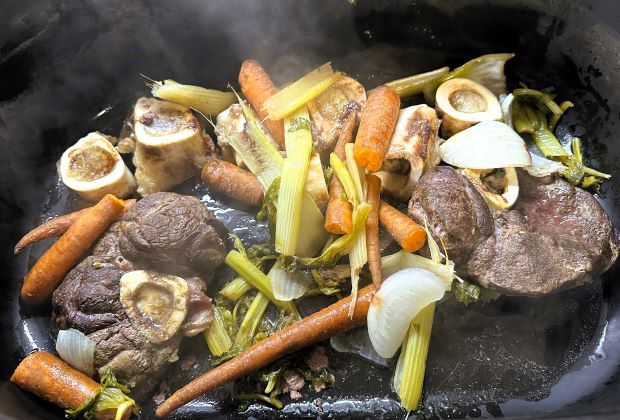
When it comes to beef stock, I like to use marrow bones and cross cut beef shanks. For me this adds a rich depth of flavor.
Preheat oven to 400 degrees. Place the beef bones, shanks and vegetables on a large baking sheet, season with salt and pepper to taste.
Roast the beef bones, meat shanks and veggies for about 30 minutes or until the meat is golden brown if possible.
When the bones and veggies are done, add them to a large electric roaster. Make sure to scrape all the beef bits off at the bottom of the baking sheet and add those as well as the juices. Add the fresh herbs, bay leaves, peppercorns, apple cider vinegar, salt and pepper, and enough water to cover and submerge the bones and veggies.
Bring the stock to a boil, reduce the temperature to about 200-250 and simmer the bones for up to 8 hours. If using a stock pot, place the pot on the stove and bring the mixture to a boil, reduce heat, remove any foam from the top and discard. Reduce heat and gently simmer for up to 8 hours. The longer you simmer the broth the more nutrients will be drawn out of the bones.
When done turn the heat off, let the beef stock cool down a bit, and taste and season to your liking. Strain the stock through a fine mesh strainer, sieve or cheesecloth with a bowl or pot placed underneath to catch the stock.
Place the bowl or pot in the refrigerator overnight, so the grease floats to the top and solidifies. This will make it much easier to remove the grease before pressure canning. Remove and discard the grease.
Slowly re-heat the beef stock on the stove and bring the mixture to a boil. This step is essential to make sure the stock is hot enough to be safely filled into your canning jars for safe canning. While the stock is reheating, prepare and sterilize your canning jars and add them to a pot of hot water to keep them warm before filling.
Carefully fill the jars with hot stock, leaving 1 inch headspace. Wipe the rims clean with white vinegar to ensure all of the grease is removed, add the lids and bands, twist the bands to finger tip tight.
Process the beef stock in your pressure canner in the same manner as listed above for chicken stock.
Turkey stock is another wonderful stock to have on hand in your storage pantry. I prepare and process turkey stock in the same manner as chicken stock, I just cook it on a much small scale in my slow cooker. After the turkey broth cooks in the slow cooker it turns out so gelatinous (jelly like consistency). No worries though because once the stock is heated it will turn back into broth. When stock is a gel consistency that just means it's a good healthy, nutrient dense bone broth.

- Old Fashioned Chicken Spaghetti
- Chicken & Dumplings
- Arroz Con Pollo
- Chicken & Dressing
- Lemon Chicken
- One Pot Smoked Sausage, Potatoes & Green Beans
- Creamy Chicken & Noodles
- Zuppa Toscana Soup
- Chicken Noodle Soup
- Baked Potato Soup
- Chicken Corn Chowder
- Garden Harvest Chicken Stew
- Hurry Up Chicken Pot Pie
- White Bean Chicken Chili
- Stuffed Pepper Soup
- Goulash
- Instant Pot Mac & Cheese
- Slow Cooker Beef Stew
- Pork Caldo
- City Chicken
- Baked Pork Chops & Rice
- Low Country Smothered Pork Chops
- Cilantro Lime Rice
- Instant Pot Pinto Beans
- Creamed Turkey
Hungry for more? Check out the Recipe Index by Mommy’s Kitchen.
Be social and follow along on Facebook, Tik Tok Instagram, Pinterest and Twitter for all the latest updates!
Join the Mommy's Kitchen Mailing List and you'll get the latest recipes and updates delivered straight to your inbox for Free!


.png)


.png)
.jpg)

0 comments