
Dried orange garland with cinnamon dough ornaments is such a fun old-fashioned holiday decoration, and it's really simple to make.  I've always been a sucker for an Old Fashioned Christmas! If I could only go back a few generations, I think I would feel right at home. Times were harder back then, but they were also simpler and less complicated. Do you ever wonder how Christmas turned into such a chaotic and stressful time?

Well, I do and that's not what Christmas, should be about. 🎄 It's about love, spreading joy, celebrating traditions, enjoying family and friends and giving what you can. I have always said it's not what's under the tree that matters, but what's around it, and, for me that's "my family".
When I think of an old-fashioned Christmas it's all about simple things, giving homemade treats and handmade gifts to family and friends, making homemade ornaments and decorations for a homespun look, baking family recipes, and my Mom's Christmas Butter Cookies, watching the parade on Christmas morning, a big Christmas dinner, watching old holiday movies and driving around looking at holiday lights. Those are my favorite things.

I also love anything thrifted, vintage, old-fashioned and handmade, so today I'm excited to share this Dried Orange & Cinnamon Ornament Garland. It's simple to make and adds a beautiful homespun touch to your Christmas holiday. Bringing in natural elements such as, greenery, pinecones, flowers and fruit to decorate, adds an old-fashioned touch and a cozy feeling to our home.
This dried orange and cinnamon garland is perfect for an old-fashioned theme. I use them all around our home, strung across mantels or a hutch, draped across tables or added to window ledges or pine wreaths. You just can't go wrong with a homemade garland.
All you need for this festive garland is dried orange slices (apple slices too), dried cinnamon ornaments, cinnamon sticks, twine and ribbon. So, let's get started and make some dried orange and cinnamon garland to brighten up your holiday season.
I prefer to dry oranges in a dehydrator versus and oven because they take on more of a natural orange color versus oven drying where the oranges tend to get browner in color. You can certainly dry the oranges in the oven if you do not have a dehydrator, but just keep that in mind.
.jpg)
Start by slicing the oranges to about 1/8 - 1/4 inch thick. Blot with paper towels to remove excess juice.

Arrange the orange slices on the on the dehydrator trays, leaving room for air flow. Set the temperature to 135 (fruits and vegetables) and set for 6 hours. Start checking the orange slices after 2 hours and flip the slices over.

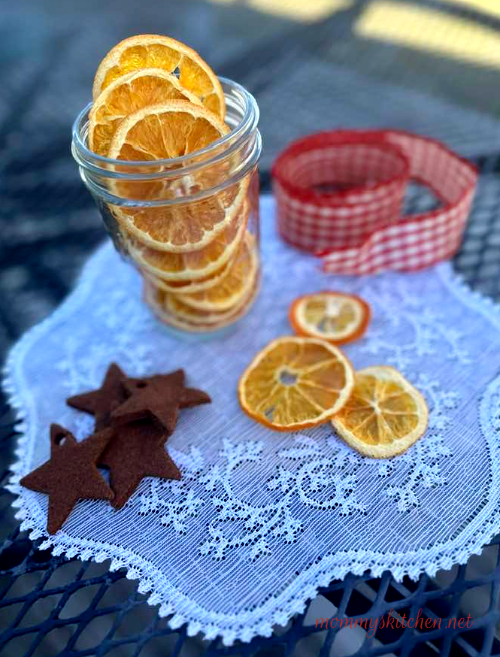
The drying process depends on how thick the oranges are sliced, so the time can vary anywhere from 4-7 hours. Once the orange slices are completely dehydrated and no moisture remains, cool them completely and then store them in mason jars until ready to use.

I baked some cinnamon applesauce ornaments for my daughter a couple weeks back and made some extras for myself to make this garland.

String the orange slices on twine along with cinnamon sticks, cinnamon ornaments and ribbon to make the garland. I tie little knots along the way so the ornaments and orange slices do not slide around. Tie a loop on each end to hang the garland (I use small command hooks).


Be social and follow along on Facebook, Instagram, Twitter and Pinterest! for all the latest updates!
Join the Mommy's Kitchen Mailing List and you'll get the latest recipes and updates delivered straight to your inbox for Free!
0 comments