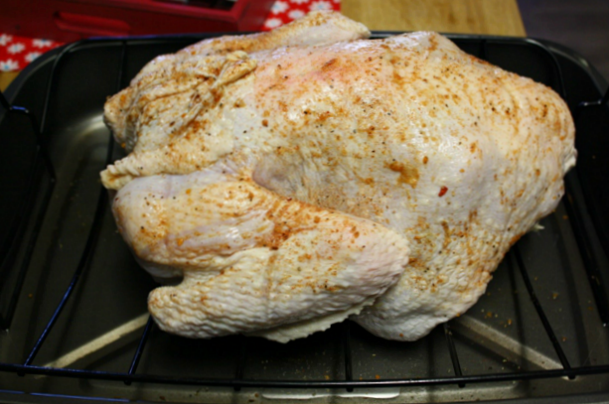
Brining and then roasting a turkey upside down is the perfect recipe for a juicy, flavorful, fool proof Thanksgiving Bird every time!
If you've never cooked a Thanksgiving turkey, the whole process can be a bit intimidating, especially for a first timer. No worries though, because cooking a Thanksgiving turkey is not as stressful as you think. Today I'm sharing a step-by-step process that yields the most juicy and flavorful turkey every time.
If you want a juicy bird that's big on flavor, try brining your turkey with your favorite turkey brine, seasoning with a dry rub and roasting it upside down. Cooking a turkey upside down ensures that the breast doesn't dry out.
Also make sure to use a meat thermometer, especially if this is your first time cooking a turkey. Test the turkey by inserting the meat thermometer in the thickest part of thigh (without hitting the bone). When the temperature reads a minimum of 165 F, the turkey is ready to come out of the oven.
After roasting the turkey should rest for at least 20 - 30 minutes before carving. Cover the turkey loosely with foil to keep warm. This is the perfect time to make the gravy!!! I have included a wonderful Giblet Pan Gravy recipe that uses the tasty turkey pan drippings. So without further ado, let's get started and cook a turkey!
To start you will need to remove the packaging with the (neck, giblets and liver) from the inside of the turkey. Rinse the whole turkey thoroughly inside and out under cold running water. Set the turkey aside on a large platter and set the neck, giblets and liver aside as well (later you will use the neck, giblets and liver to make a flavorful broth for the gravy, so don't toss them out).
Next you will need to brine the turkey (immersing the turkey in a seasoned - salt water solution). When it comes to turkey brines just go with your favorite recipe or purchase a store bought brine. My personal favorite brine is by Rodelle !!! Rodelle's Turkey Brine is filled with salt, sugar, garlic, cranberries, dried vanilla beans, apple peels, orange peels, bay leaves, black pepper, thyme, rosemary and sage. I get a large container at Costco for less than the price of a small one at most stores or online. Rodelles has the perfect combination of dried fruits and seasonings.
To start the brine add the water and brine called for on the back of the brine bottle (according to your turkey size) into a large pot.
Heat the brine mixture over medium-high heat just until the salt dissolves. Remove from heat and let the mixture cool.
Add the turkey to a very large pot (I use my canner pot). Pour the brine over the turkey making sure to cover the entire turkey. Refrigerate the turkey for 10- 12 hours or place the pot with the turkey in a large cooler, add ice around the pot and cover. After 12 hours, remove turkey from brine and rinse inside and out under cold running water until all the salt brine has been removed. Cross the legs and tie them together loosely with kitchen twine to hold their shape.
Place the turkey on a roasting rack and brush the entire breast side of the turkey with 2 tablespoon of melted butter. Add the dry rub seasoning mixture on the inside and outside of the turkey (rubbing it into the skin). Place turkey breast side down on the roasting rack. Brush the back of the turkey with the remaining 2 tablespoons of butter. Roast the turkey at 325 degrees (uncovered) breast side down for 1 1/2 hours.
Remove pan from oven and close the oven door. Using clean hot pads or oven gloves, turn the turkey over so the breast side is facing up. If the water has evaporated add 1/2 - 1 cup more water. Tuck the wings under the bird and baste the turkey with pan juices, Return the turkey to the oven and continue roasting (covered with foil) for 1 1/2 - 2 hours or until a meat thermometer reads 165 degrees (on the thigh and 160-165 degrees for the breast) and the skin is golden brown. Remove the foil the last 30 minutes of cooking.
Remove turkey from oven and remove from pan (reserving pan juices) and transfer to a platter. Cover turkey loosely with foil and let rest for 20 - 30 minutes before carving. Now it's time to make the gravy while the turkey rests.
Hungry for more? Check out the Recipe Index by Mommy’s Kitchen.
Be social and connect with me on your favorite social media channel for recipes, gardening, simple living and more: Facebook, Instagram, You Tube, Pinterest and Twitter.
If you like seeing my recipes and menu plans subscribe to our Mailing List and stay up to date with all the latest recipes and posts.
If you try a recipe, please come back & leave a comment letting us know. Share a picture & tag @mommyskitchen on Instagram.


.png)

0 comments