
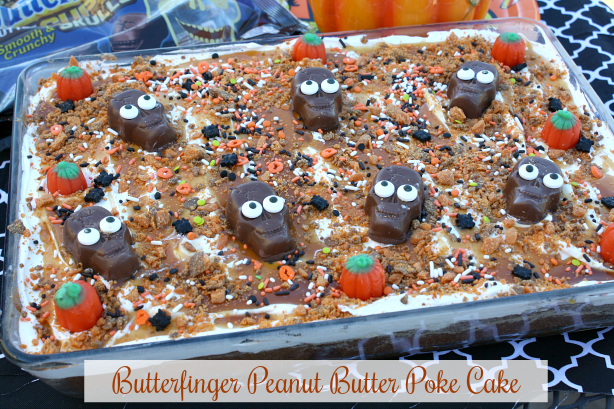
This fun spook-tacular Butterfinger Peanut Butter Poke Cake is sure to be a huge crowd-pleaser at your next Halloween party or get-together. #ad #Butterfinger #Nestle

For my teenagers instead of trick-or-treating now, it's all about dressing up, getting together with friends and handing out candy to the neighborhood kids. I always plan something fun, a themed dinner and scary movies are always a must to kick off Halloween and I always make a yummy dessert to end the night. It's usually something simple with a festive Halloween theme.

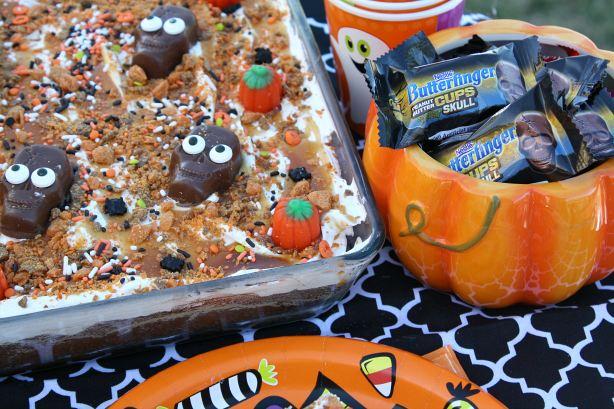
When Nestle approached me about creating a craft or recipe using their new Nestlé Butterfinger Peanut Butter Cup Skulls, I was totally on board and I knew exactly what treat I wanted make. Move over pumpkins and make room for the New Limited Edition fun size Nestlé Butterfinger Peanut Butter Cup Skulls!
These fun size skulls have the perfect combination of creamy milk chocolate, smooth peanut butter and crunchy butterfinger bits all molded together in a fun spooky skull shape. Each fun size candy skull are free of artificial flavors and colors and come individually wrapped in a 10.8 oz lay down package with 18 skulls. These fun size skulls are the perfect treat for candy bowls, trick-or-treaters or to bake up a spooky Halloween themed recipe.

For this poke cake I baked up a yellow butter cake and added creamy peanut butter to the batter. When the cake was finished baking, I poked holes all over the top and poured a mixture of sweetened condensed milk and a caramel sundae topping over the holes.
When the cake was completely cool, I frosted it with whipped topping (fresh cream can also be used) and sprinkled crushed butterfinger bits on top. To finish off this festive cake, I added the Nestlé Butterfinger Peanut Butter Cup Skulls, candy eyes and some colorful pumpkin and spider sprinkles.
My whole family loved this spooktacular poke cake and I'm already thinking of new ways to use these adorable chocolate skulls. If you're looking for a quick and impressive dessert for your upcoming Halloween or fall celebration I think this is it!!!!!!!!!!!!!! Let's get started and I will show you how simple this cake came together.


Yield: 12
Butterfinger - Peanut Butter Poke Cake
This fun spook-tacular Butterfinger Peanut Butter Poke Cake is sure to be a huge crowd-pleaser at your next Halloween party or get-together
Prep time: 15 MinCook time: 30 MinTotal time: 45 Min
Ingredients
- 1 (15.25 ounce) yellow cake mix + oil or butter, water and eggs called for on box mix (I used golden butter cake mix)
- 1/2 cup creamy peanut butter
- 1 (14 ounce) can sweetened condensed milk
- 1 jar caramel sundae topping, separated
- 1 (8 ounce) container whipped topping or fresh whipped cream frosting
- 1 Butterfinger candy bar or fun size butterfinger candy bars, crushed
- 8 Fun Size Butterfinger Peanut Butter Cup Skulls
- Halloween sprinkles, candy eyes, candy spiders, and pumpkins for garnish
Instructions
- Preheat oven to 350°F.
- Spray a 13 x 9 inch baking pan with non-stick baking spray and lightly flour pan (removing any excess flour).
- Prepare cake according to package directions, adding oil or butter, water, eggs and peanut butter.
- Bake cake according to package directions for a 13 x 9 - inch baking pan. Use a toothpick to test cake for doneness.
- Let cool for about 10 minutes. Poke holes in the cake using the end of a wooden spoon or something similar.
- In small bowl, mix the sweetened condensed milk and half a jar of the caramel topping together.
- While the cake is still warm, pour the caramel mixture over the warm cake making sure most of it gets into the holes of the cake.
- When the cake is cool, spread the whipped topping or fresh cream evenly over the top of the cake.
- Drizzle the remaining caramel topping over the cake and sprinkle with crushed Butterfinger candy bar pieces.
- Garnish with sprinkles, candy and fun size Butterfinger Peanut Butter Skulls. Add the candy eyes to each Butterfinger skull.
- Store cake in refrigerator until ready to serve. Store any leftovers in the refrigerator.
Notes:
Fresh Whipped Cream Frosting:
Add 2 cups heavy whipping cream, into a large bowl or stand mixer. Add 3/4 cup powdered sugar and 1/2 teaspoon vanilla extract. Whip the cream slowly over medium-high speed until ripples start to form. Turn off mixer and finish whisking by hand using a wire whisk until the cream starts to thicken and stick to the whisk. Frost cake with whipped frosting.

For more Butterfinger Halloween recipes stop by the Butterfinger Halloween Pinterest page and follow along on Facebook, Instagram and Twitter.
This is a sponsored conversation written by me on behalf of Nestlé. The opinions and text are all mine.
15 comments